

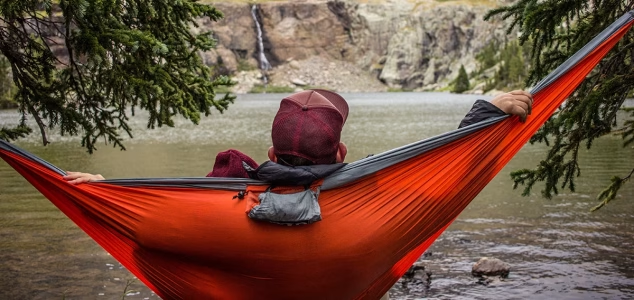
Master Your Camping Hammock Setup for Ultimate Outdoor Comfort
For years, the trusty tent has been the go-to shelter for campers and backpackers alike. But there’s a growing buzz around an alluring alternative that’s quickly gaining popularity the camping hammock.
If you’ve ever enjoyed the blissful sway of a hammock on a lazy afternoon, it might just be time to consider taking that comfort into the great outdoors for an overnight adventure. This comprehensive guide will walk you through everything you need to know about mastering your camping hammock setup, ensuring you enjoy unparalleled comfort and a truly unique outdoor experience.
What Exactly is Hammock Camping?
Hammock camping is precisely what it sounds like: trading your traditional tent for a specialized camping hammock and a few essential accessories to comfortably sleep under the stars.
It’s a favorite among backpackers and bike-packers due to its incredibly lightweight nature and minimal pack space requirements.
Beyond the practical benefits, hammock campers often enjoy a superior vantage point and are spared the discomfort of sleeping on uneven, rocky, or sloped ground. All you truly need are a couple of sturdy trees, and you’re ready to elevate your camping game.
Why Choose Hammock Camping Over a Tent?
While tents offer a familiar sense of enclosure, hammock camping presents several compelling advantages. The elevated sleeping position provides better airflow, which can be a blessing on warm nights, and keeps you away from ground-dwelling critters and dampness.
The natural sway of a hammock can also be incredibly soothing, leading to a more restful night’s sleep. Furthermore, setting up a hammock can often be quicker and more versatile than pitching a tent, especially in areas with uneven terrain where finding a flat tent site is a challenge. It’s about embracing a different kind of connection with nature, one that’s open, airy, and deeply relaxing.
Essential Gear for Your Hammock Camping Adventure
To ensure a successful and comfortable camping hammock setup, you’ll need more than just the hammock itself. Think of it as building a modular sleep system tailored to your needs and the conditions you’ll encounter. You can either enhance your existing hammock with additional components or invest in a pre-packaged “hammock tent” system that often includes most of the items listed below. Regardless of your approach, here’s a breakdown of the crucial gear:
Your Hammock: The Foundation of Comfort
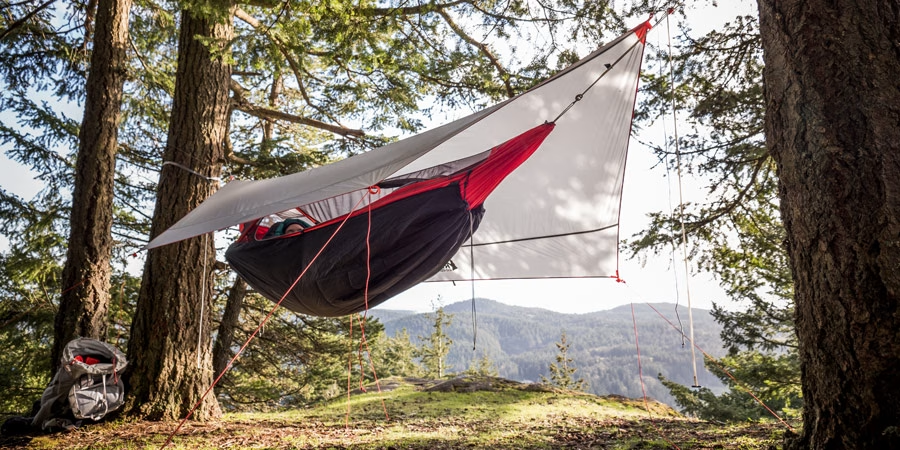
At the heart of your setup is, of course, the hammock. While almost any hammock can serve as the centerpiece, comfort should be your primary consideration when choosing one for camping. If you’re backpacking, weight will also be a significant factor. Beyond the classic sling design, you’ll find innovative options on the market. It’s always a good idea to try lying in a few different models to compare their feel and support. Consider factors like material (nylon, polyester), size, and weight capacity to find your perfect match.
Suspension Systems: Secure and Tree-Friendly
Forget about bare ropes – they can damage tree bark and are a definite no-no for responsible hammock camping. A high-quality suspension system with wide, tree-friendly straps is absolutely essential. These systems, typically sold separately from the hammock, not only protect the trees but also make your camping hammock setup incredibly easy, often requiring no special knots. Some integrated hammock tent systems might include thick ropes with protective sleeves, but wide straps are generally preferred for their ease of use and tree preservation qualities.
Staying Warm: Underquilts vs. Sleeping Pads
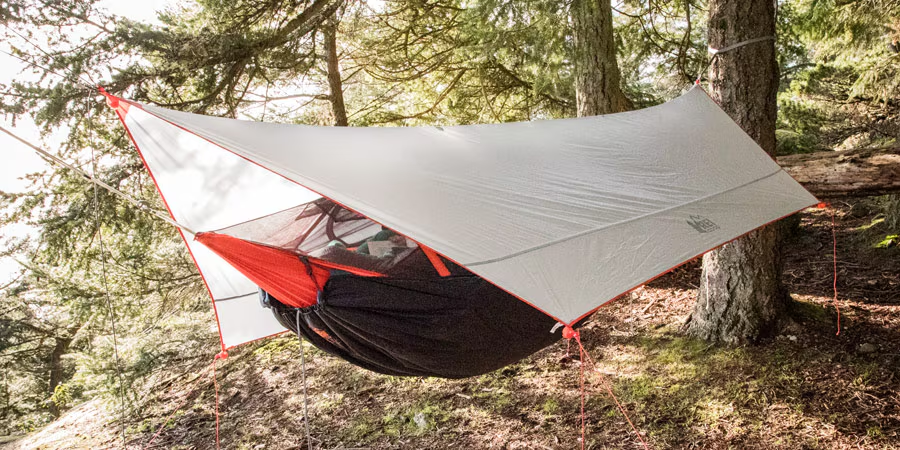
One of the most common challenges in hammock camping is staying warm, especially from below. When you lie in a sleeping bag, the insulation on the underside gets compressed, losing its thermal efficiency. In a tent, a sleeping pad solves this, and you can use a pad in a hammock too.
However, pads might not conform perfectly to the hammock’s shape. Some campers use accessory sleeves to stabilize their pads or slightly deflate air pads for a better fit. Closed-cell foam pads can also be cut to size, offering an inexpensive and effective solution with added wind resistance.
For superior warmth, particularly in cooler conditions, an underquilt is the gold standard. Unlike a sleeping pad, an underquilt hangs beneath your hammock, allowing its insulation to loft fully without compression. This provides consistent warmth around your entire underside, making it a more effective (though often pricier) solution for cold-weather camping hammock setup.
Rain Protection: Choosing the Right Tarp
A rain tarp, often called a rainfly, is your hammock’s equivalent of a tent’s waterproof outer layer. It’s typically mounted over a ridgeline (a line tied between two trees above your hammock) to create a protective overhead shelter. When selecting a tarp, ensure it’s specifically designed for hammocks or provides ample attachment points to secure it effectively. The right tarp is crucial for keeping you dry and comfortable, transforming your open-air sleep into a cozy, weather-protected haven.
Bug Protection: Keeping Pests at Bay
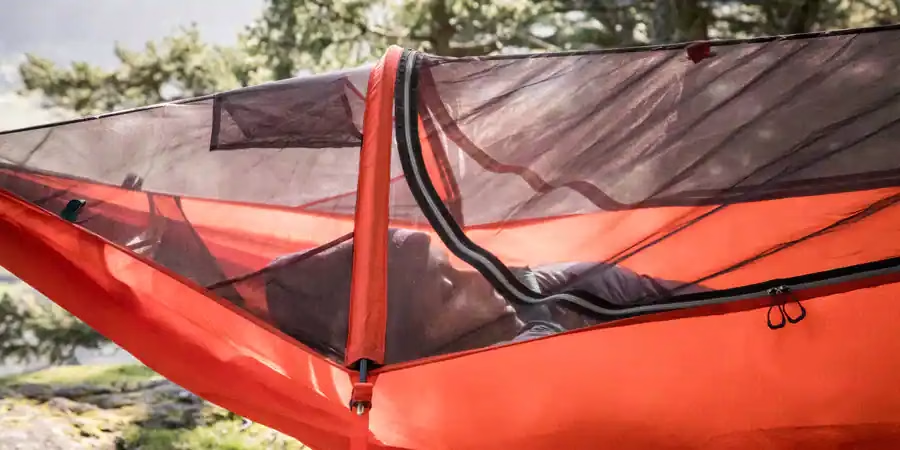
Nothing ruins a peaceful night outdoors faster than buzzing insects. A bug net is an indispensable part of your camping hammock setup in buggy environments. Many nets are designed to fully enclose your hammock, while others only cover the top. If you opt for a top-only net, your sleeping bag and pad will offer some protection from below, but you might also consider treating the bottom of your hammock with a fabric-safe insecticide like permethrin for added defense. A good bug net ensures you can enjoy the fresh air without becoming a mosquito’s dinner.don’t forget to check our topic Camping Checklist for First Timers
How to Set Up Your Camping Hammock Like a Pro
Mastering your camping hammock setup involves more than just hanging your gear. It requires a mindful approach to site selection, tree care, and the physics of a comfortable hang. Follow these guidelines to ensure a perfect setup every time:
Choosing the Perfect Spot: Location, Location, Location
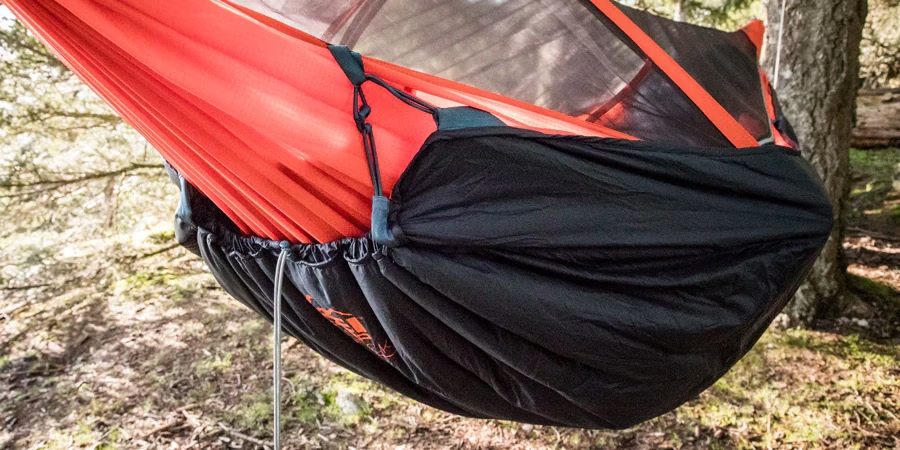
Before you even unroll your hammock, select an appropriate location. Always check with land managers regarding hammock camping regulations and guidelines. Adhere to Leave No Trace principles, such as setting up at least 200 feet from water sources and utilizing established campsites. Look for two healthy, sturdy trees that are spaced appropriately for your hammock, typically 10-15 feet apart, depending on your hammock length and desired sag.
Being a Responsible Tree Steward
Protecting the environment is paramount. Always choose healthy, robust trees with a diameter of at least 6 inches (or more for most species). Use wide tree straps, ideally 1.5 inches or wider (some parks even mandate 2-inch straps), to distribute pressure and prevent damage to the bark. Avoid hanging from dead trees, those with visible signs of disease, or trees that appear to be home to nests or other wildlife. Your camping hammock setup should leave no lasting impact on the natural surroundings.
The Golden Rule of Hanging: Achieving the 30-Degree Angle
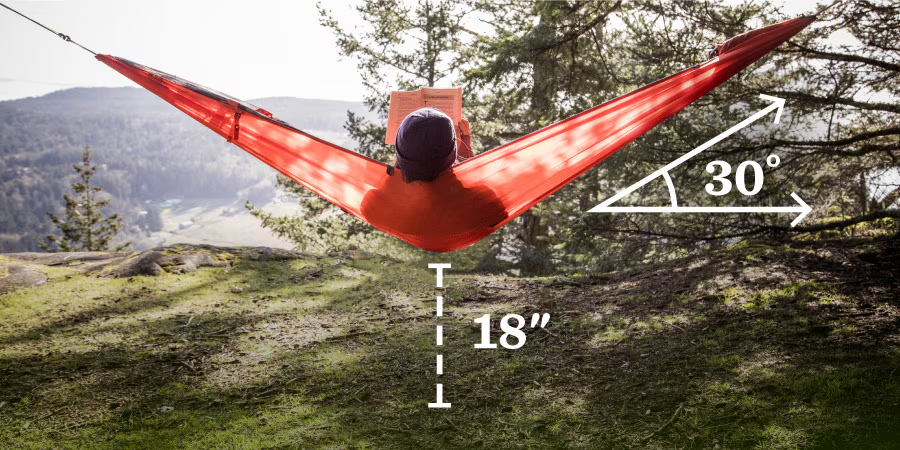
For optimal comfort, avoid hanging your hammock too flat or too taut. The sweet spot for a comfortable and stable hang is achieved when your suspension straps angle up at approximately 30 degrees from the hammock to the tree. This creates the perfect amount of sag, allowing you to lie diagonally for a flatter, more comfortable sleeping surface. Additionally, ensure the lowest point of your hammock is no higher than about 18 inches off the ground, making it easy to get in and out.
Setting Up Your Rain and Bug Shelters
Once your hammock is perfectly hung, it’s time to add your protective layers. These steps are integral to a complete and functional camping hammock setup.
The Ridgeline: Your Tarp’s Best Friend
To suspend your rain tarp effectively, you’ll need a ridgeline. This is a cord that runs above your hammock, connecting to the same anchor points (or separate ones, depending on your setup). The ridgeline not only supports your tarp but can also be used to hang lightweight items like an organizer pocket. Ensure your ridgeline cord is longer than your hammock, with enough extra length to secure around both anchor points. While some hammock systems include a ridgeline, you’ll often need to provide your own.
Securing Your Rain Tarp for All-Weather Protection
With the ridgeline in place, securing your rain tarp is the next step. While specific details may vary by tarp model, the general process involves maintaining tension where the tarp touches the ridgeline and staking out its perimeter. In calm weather, you might hang your ridgeline higher to allow standing room beneath the tarp. However, if wind-driven rain is a possibility, a lower ridgeline provides better protection. Proper tarp setup is key to a dry and enjoyable camping hammock setup, regardless of the weather.
Attaching Your Bug Net: A Shield Against Pests
The method for attaching your bug net will depend on its design. Many full-coverage nets attach to your hammock straps at one end, allowing you to temporarily unclip your hammock, slide the net over, and then re-clip. Once fully extended, secure the net to the strap at the other end. Some nets require an additional ridgeline threaded through loops on top for support. Access to your hammock is typically through a zippered opening in the net. A properly installed bug net completes your protective shell, ensuring a peaceful, bite-free night.
Tips for a Blissful Night’s Sleep in Your Hammock
Even with the perfect camping hammock setup, a few insider tips can make all the difference for a truly comfortable night’s sleep:
The Diagonal Lay: Unlocking True Comfort
This is perhaps the most crucial tip for hammock comfort. Instead of lying straight along the centerline of your hammock, try lying slightly off-kilter, at a 10 to 15-degree angle from the center. This diagonal lay flattens the fabric beneath you, creating a surprisingly flat and spacious sleeping surface that eliminates the
“cocoon” feeling and allows for a much more comfortable rest.
Finding Your Perfect Pillow
Many hammock campers find that the natural lip of the hammock itself serves as an ideal headrest. However, if that doesn’t quite work for you, experiment with a small pillow or even a stuff sack filled with soft clothing, like a puffy jacket. Large, bulky pillows tend not to be practical or comfortable in a hammock, so opt for something compact and adaptable.
Keeping Essentials Within Reach
Strategic placement of your nighttime necessities can greatly enhance your hammock camping experience. A small stuff sack with essentials can be kept inside the hammock with you. Another excellent option is a gear sling accessory, which hangs just below your hammock (and often inside your bug net), keeping items like headlamps, water bottles, or books easily accessible. Remember, the space beneath your hammock can also function like a tent vestibule, offering covered storage for larger items such as boots or your backpack, keeping them protected from the elements.
Conclusion
Mastering your camping hammock setup opens up a world of comfortable, lightweight, and uniquely immersive outdoor experiences. From selecting the right gear and understanding the optimal hanging angles to protecting yourself from the elements and ensuring a restful night’s sleep, each step contributes to a more enjoyable adventure. Embrace the sway, connect with nature, and discover why so many outdoor enthusiasts are making the switch to hammock camping. Happy hanging!